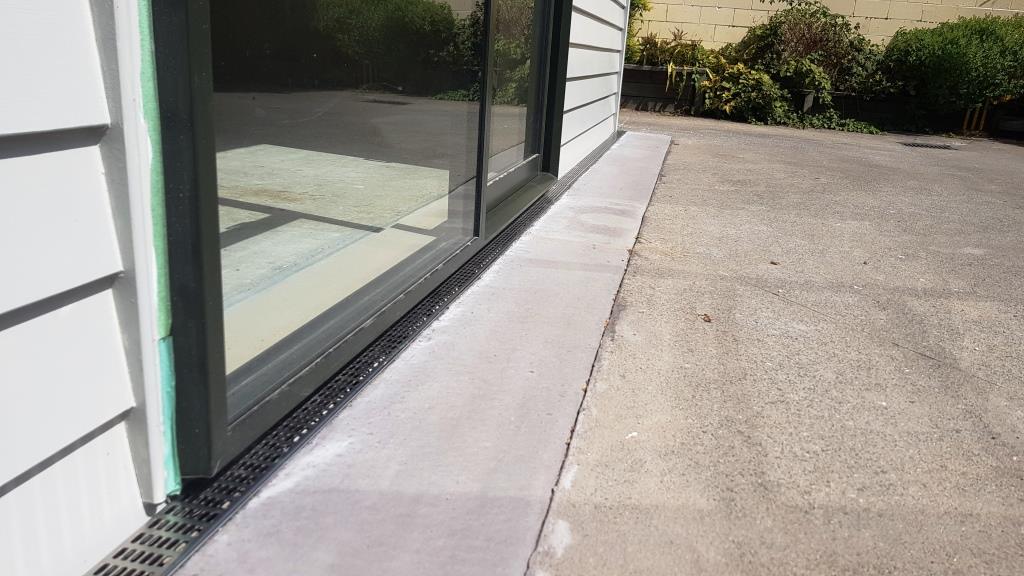
The Complete System can be Installed prior to Concrete pour: No need to haunch Channel Sections, Scree in Fall or Fit Grates after Installation.
Step 1. Orientate Channel (Left to Right or Right to Left), Anchor Bolt Channel to Slab, Silicon Sealant Applied between Channel & Slab Face, Support Systems Positioned to Create a 12mm miniumum Gap between Grating and Building
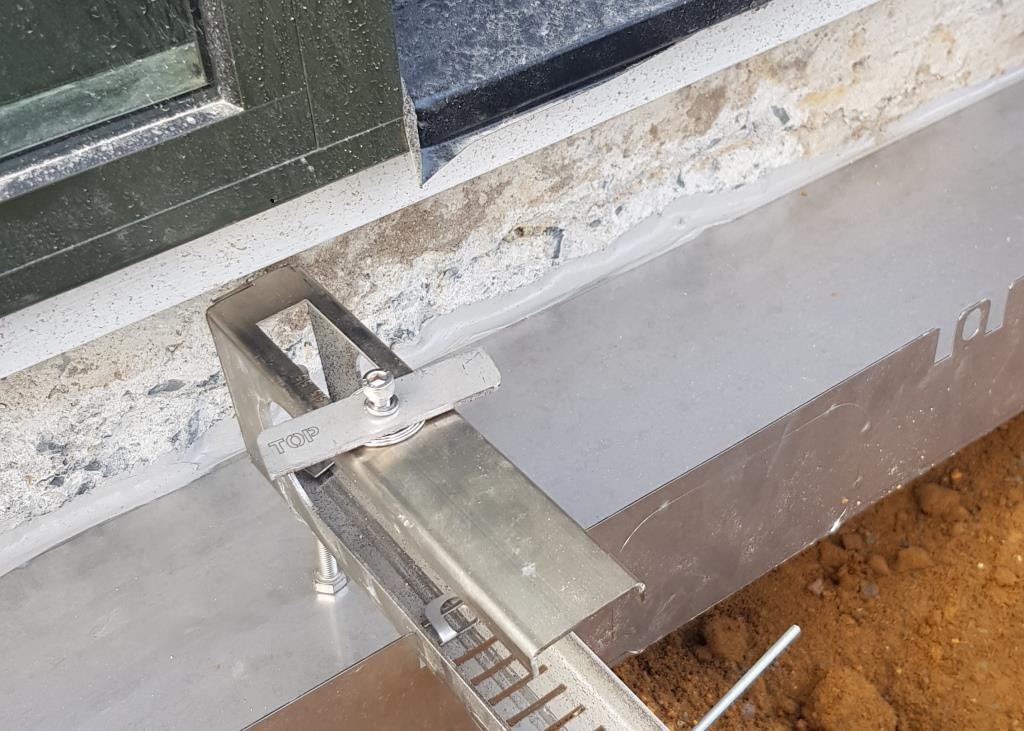 Easy to Adjust Channel Length and Height during installation
Step 2. Attached Grating to Support Systems 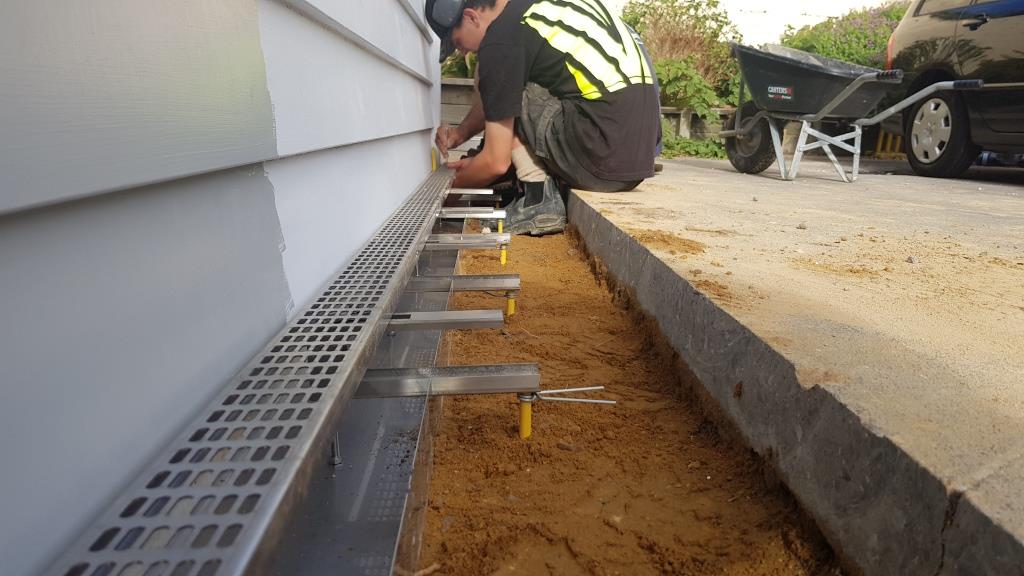 Various Widths of Grating to Fit Building Line
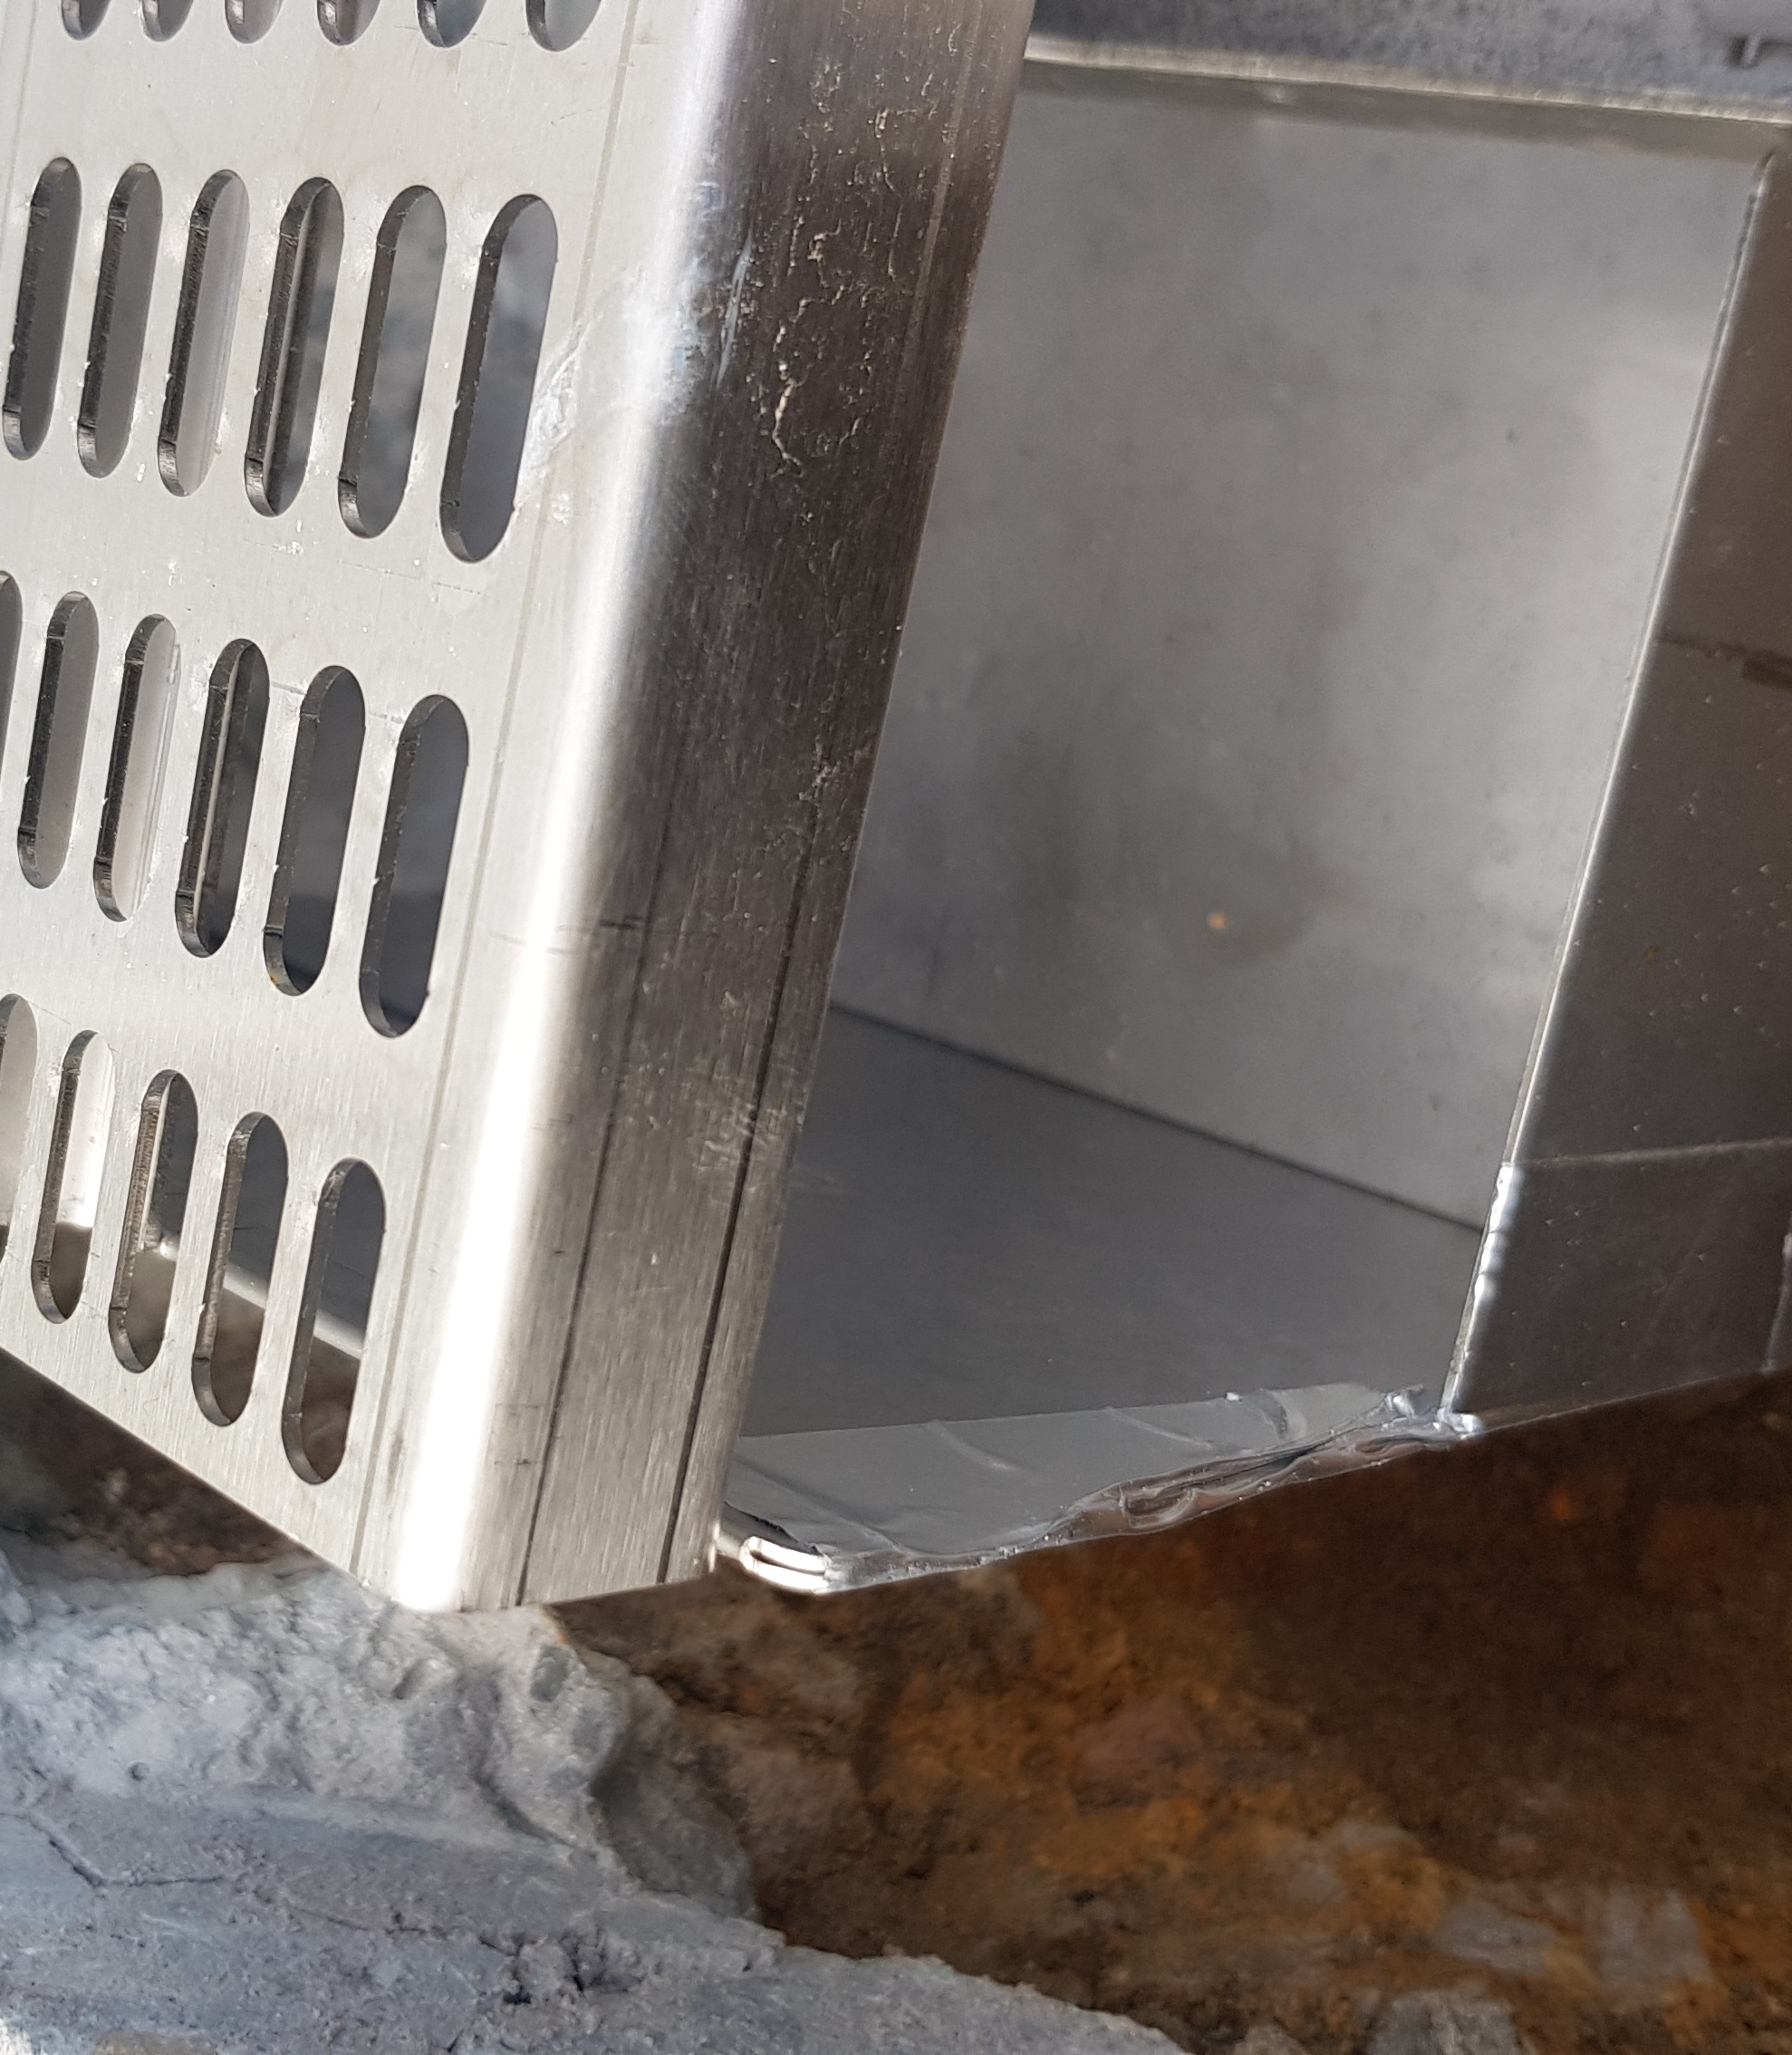
Step 3. Attached Inline sump
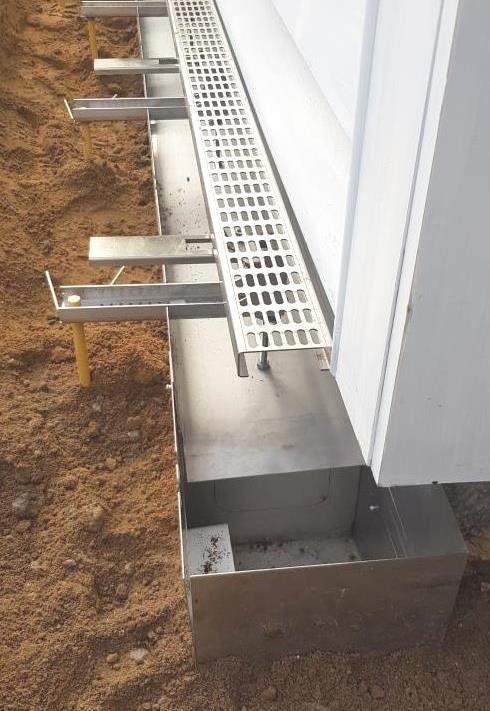 In-Line Sumps and Channel have Knock-outs to fit Marley Kerb Outlet
Step 4. Facia Attached to Enclose Channel Load Bearing along each section can be Adjusted by Varying the Distance between the Support Systems. For example, 250mm intervals (Vehicle entrance), 500mm (Pedestrian entrance) 750mm & 1000mm (No traffic).
Step 5. End Cap Attached
 End caps are attached to the Channel & Fascia with Aluminium Adhesive Tape Prior to the Concrete Pour.
Step 6. Concrete Pour